...
Identify and lay the studs toes down on a level surface and align as per assembly drawing. The heads, sills and noggings should be pre-notched to allow parts to overlap as shown, however, certain nogging sections with double or triple web punches may have a web section still connected to improve the roll forming efficiency. See section 2a Prepare Noggings and U sections. Pre-punched holes are provided for trilobular fastener screws to connect the frames.
Locate and open matching stud and nogging / plate bundles before separating into individual frame packs.
...
- Place the stud with the web down.
- With a small cold chisel and a hammer, flatten the ribs on the rib in line with the stud flange.
- With a pair of duck bill pliers, bend the tab in the appropriate direction. (Refer to layout plan provided with job outputs.)
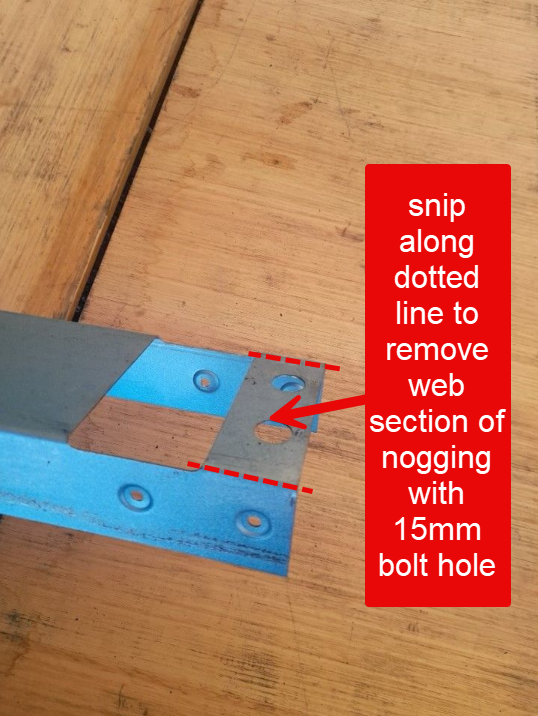
Step 2a - Prepare Noggings and U-Sections
With the noggings and plate sections separated into their individual wall numbers, check each U section for any double 15mm bolt hole punches (see below picture). This punch represents a web section of the nogging to be cut out on site prior to wall fabrication using tin snips or a suitable cutting tool. Note that ONLY the web section of the plate needs to be removed, the flanges of the u section are to remain connected.
Step 3: Lay out studs and insert into top and bottom plates
...