7.0 Wall frame installation
Now that you have constructed the wall frames you can complete the installation process. This involves:
- identifying panels and moving them to their rough locations
- standing wall panels upright and fixing intersecting walls
- aligning walls with chalk lines then fixing the walls to the slab or platform floor
- checking whether wall frames are plumb and square
- fixing temporary bracing to long walls until the roof is completed
- fixing permanent bracing to provide bracing for nogging and prevent rattling
- fixing the stud-to-plate connections at the top of walls.
To install the wall frames:
Identify the rough panel locations by checking the wall panel number against the supplied wall panel layout generated by the ENDUROCADD® software.

Figure 8.1: Identifying wall panel locations using the generated wall panel layout.Unpack the panels and lay them near their required positions to avoid unnecessary handling.
Note
Walls are generally constructed by working across the whole building, not around the perimeter. This avoids issues relating to trying to fit interior walls after the perimeter is finished.
Starting from one corner of the building, mark the exact panel locations on the slab or platform floor using the chalk line.
Note
Refer to the project drawings for the exact locations of panels.
- Stand the first wall frame on the location points marked using the chalk line.
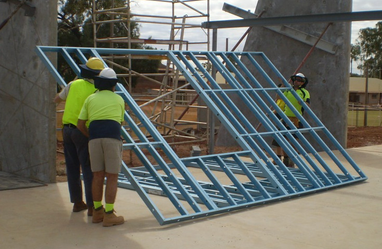
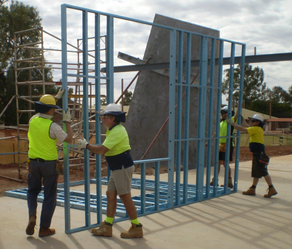
Figures 8.2 and 8.3: Standing up the first wall frame. - Stand the next intersecting wall frame flush against the previous frame using the chalk line as a guide.
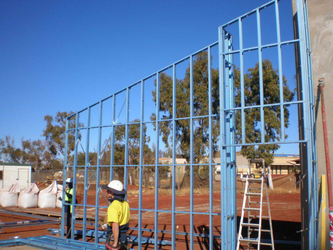
Figure 8.4: Placing the second wall into position flush against the first wall using the chalk line as a guide - Use a clamp to temporarily hold the wall frame in position.
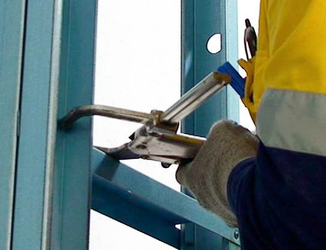
Figure 8.5: Using a clamp to temporarily hold a wall frame in position. Fix the intersecting wall frame to the previous frame with a butt joint by screwing the adjacent studs at the top, bottom and mid-points at a maximum of 1350mm spacing using 2 x #10-16x16 hex. head screws at each location.
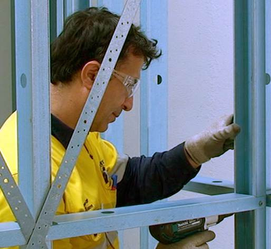
Figure 8.6: Fixing a corner wall using a butt joint at the mid-point of the wall.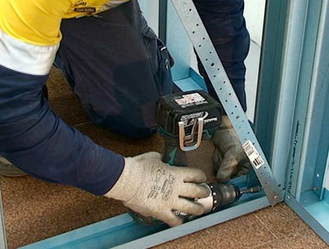
Figure 8.7: Fixing a corner wall using a butt joint at the base of wall.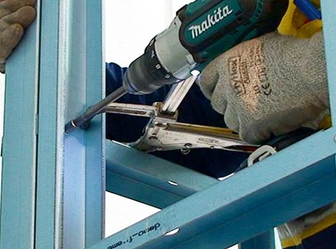
Figure 8.8: Fixing an end wall.Note
Butt joints are normally only used to connect two walls where there is no junction. You should secure the end of the wall that is not fixed to a subsequent wall using temporary propping created using a piece of channel as shown below.
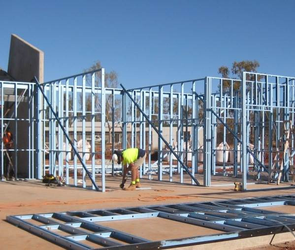
Figure 8.9: Fixing temporary bracing as required.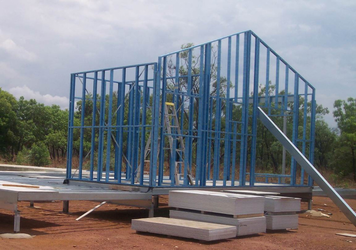
Figure 8.10: Structure with temporary bracing.
Figure 8.11: Temporarily supporting an end wall using clamps and Topspan battens.Tip
You can fix corner walls using an extension drill bit as shown below.
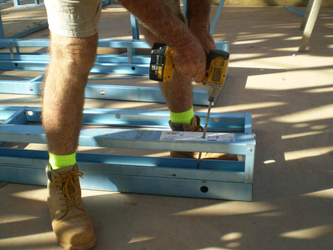
Figure 8.12: Fixing corner walls using an extension drill bit.- Repeat steps 5 through 7 to complete each junction before proceeding to the next wall panel.
- Position the final assembled wall frame on the chalk line and remove temporary bracing.

Figure 8.13: Position final wall.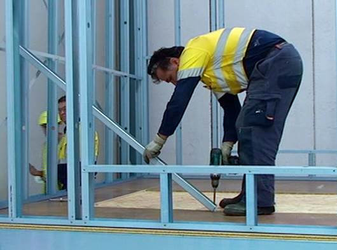
Figure 8.14: Remove last of the temporary bracing. - Fix the final wall frame using an extension drill bit, if required.
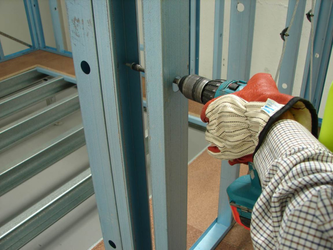
Figure 8.15: Position and fix final wall using an extension drill bit. Once all wall panels are standing, make any small adjustments required to ensure the wall panels are positioned in the exact locations marked by the chalk lines.
Figure 8.16: Align walls with chalk lines before fixing to the slab or platform floor.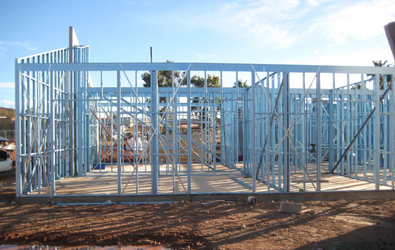
Figure 8.17: Interior walls are fixed into position.- Fix each wall to the floor through the bottom plate of the wall frame using the hold down and spacing specifications of the detailer.
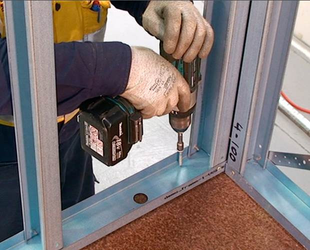
Figure 8.18: Screw bottom plate into final position on floor. Measure diagonals and ensure the structure is square.
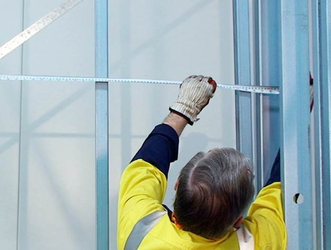
Figure 8.19: Measure lengths at bottom and top of wall to check whether frame is square.Note
If rooms are rectangular you should check the dimensions of the room by measuring and comparing diagonals then fix down the wall panels using the fixings recommended in the plan drawings.The fixings are installed next to opening jamb studs at the point where tension bracing attaches to the bottom plate and for trusses with sheet roofs, next to the studs carrying roof loads.
Use a spirit level and straight edge to check if the frame is true.
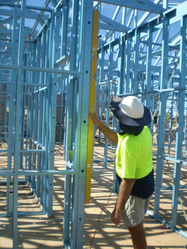
Figure 7.20: Check walls for plumb.Fix temporary bracing to align and plumb long walls until the roof is completed.
Note
You can plumb the frame by adjusting the bracing tensioners. Tighten one strap and loosen the other to rack the wall until the studs are plumb.

Figure 7.21: Check plumb and square and adjust as required.Fix permanent bracing where specified on the wall panel layout to provide bracing for nogging and prevent rattle within the walls after lining. You need to ensure:
• #10-16x16 wafer head screws are used for lined or clad walls
• #10-16x16 hex. head screws are used on external walls in brick veneer construction.Note
Wall bracing is typically diagonal straps of G250/300 material screwed into the wall frame at each end using #10-16x16 wafer head screws. Using the supplied tensioner set the site erection crew can apply tension to the strap brace pair on site to rack the wall, which enables the wall to be made plumb (studs vertical in both directions).
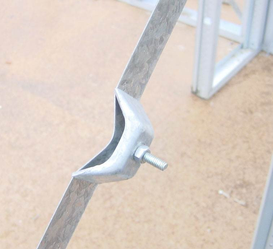
Figure 7.22: Tensioner on strap bracing.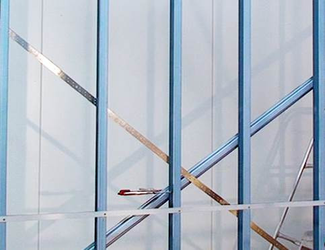
Figure 7.23: Setting the wall frame square and plumb using vice grips, strap bracing and a tensioner.Tip
You can use TOPSPAN® battens as temporary bracing to hold the frame in position while permanent strap bracing fixed and adjusted to make the wall frame plumb and square. Once the wall frame is true, the temporary bracing can be removed.
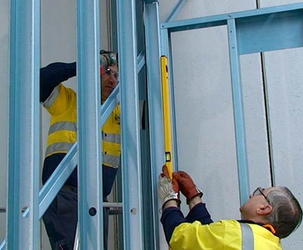
Figure 7.24: Using a length of Topspan batten to hold the wall frame square until bracing is tensioned.- Fix the stud-to-plate connection at the top of the wall as specified for the specific site conditions.
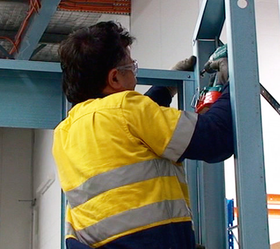
Figure 7.25: Fix the stud-to-plate connection at the top of the wall once the frame is plumb and square.
Wall frame construction is complete.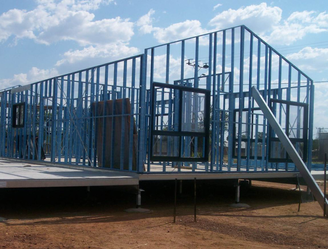
Figure 7.26: Wall up, plumbed, squared and fixed - ready to fit roof trusses
DOC-71 - Getting issue details... STATUS